
There are many tools to test network speed, such as Speedtest by Ookla, FAST.com, SpeedTest.cn.
But thoses tools is mainly for testing internet connection speed. The result will be influened by many factors and could not prove the local WiFi device prerformance exactly.
To reduce the variables of uncertainty to impact the WiFi bandwidth test result, we suggest to use the LAN test environment. So we will show you how to do it here step by step.
How to Setup an iPerf Test Environment? iPerf is a command-line tool that measures network throughput between two devices. Unlike internet speed tests, iPerf tests the performance of your local network, making it ideal for diagnosing Wi-Fi performance issues.
1.Connection Diagram
The device whose Wi-Fi bandwidth you want to test (the “Client”) connects to your router via Wi-Fi. The other device (the “Server”) is connected to the same router using a wired Ethernet cable. This wired connection ensures the server does not compete for wireless bandwidth and provides a stable baseline
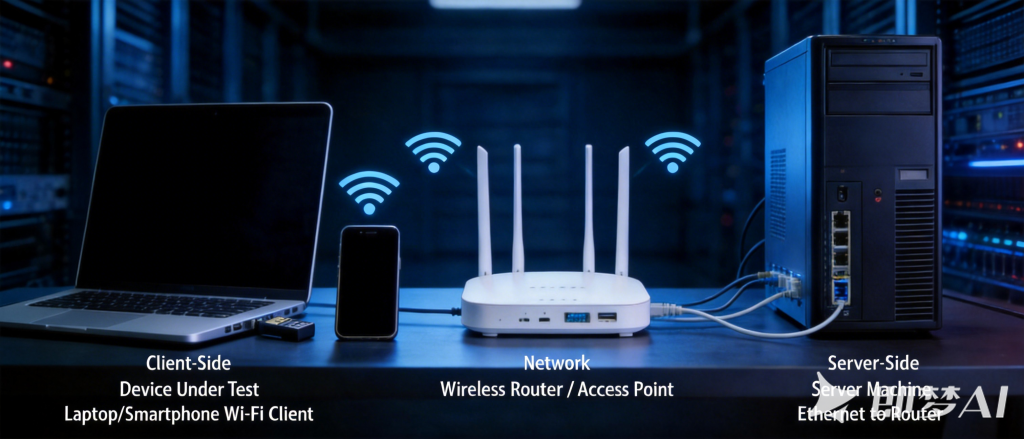
2. Prerequisites
- Two Devices: A computer(with USB WiFi dongle) or smartphone to act as the client (the Wi-Fi device under test) and a computer to act as the server.
- iPerf Installed: Install iPerf on both devices.
- Windows: Download the
.exefrom iPerf.fr and copy the files toC:\Windows\System32. - macOS: Use Homebrew:
brew install iperf3. - Linux (Ubuntu/Debian): Use
sudo apt-get install iperf3. - Smartphone: Search for “iPerf” in your app store (e.g., HE.NET Network Tools) .
- Windows: Download the
- Disable Firewalls: Temporarily disable firewalls on both devices, as they may block iPerf traffic .
- IP Addresses: Ensure both devices are on the same network. Find the Server’s IP address using
ipconfig(Windows) orifconfig(Linux/macOS) .
3. Step-by-Step Testing
Step 1: Start the Server
On the device connected via Ethernet, open a terminal/command prompt and run the command to start it in server mode :
iperf3 -sYou will see a message indicating it is listening for a connection.
Step 2: Start the Client
On the Wi-Fi device (e.g., your laptop), open a terminal/command prompt. Use the -c flag followed by the server’s IP address .
iperf3 -c <server_ip_address>Example: iperf3 -c 192.168.1.10
Step 3: View the Results
The test will run for 10 seconds by default, and the client will display the results. Look for the “Bandwidth” or “Bitrate” line. This is the measured throughput in Mbits/sec .
[ ID] Interval           Transfer     Bandwidth
[  4]   0.00-10.00 sec  1.10 GBytes  941 Mbits/sec
4. Key Commands and Options
| Command/Flag | Purpose |
|---|---|
iperf3 -s | Run the device as a server waiting for connections . |
iperf3 -c <IP> | Run as a client connecting to the server at <IP> . |
-R | Reverse the test direction (client downloads, server uploads) . |
-u | Use UDP instead of TCP for testing . |
-t <time> | Set the test duration in seconds (e.g., -t 30) . |
-b <bandwidth> | Set the bandwidth limit for UDP tests (e.g., -b 100M) . |
-i <interval> | Set the report interval in seconds (e.g., -i 1 shows results every second) . |
5. What to Expect
- TCP Test: Measures throughput with error correction. Good for general performance. A Gigabit Ethernet connection should show ~940 Mbps .
- UDP Test: Measures raw throughput and packet loss. Use the
-uflag. You can set the bandwidth with-bto see when packet loss begins . - Reverse Direction: Use the
-Rflag on the client to test the speed from the server back to the client (simulating a download) .